 Installation Guide
CognitixERP Installation Guide
Simple step-by-step setup for CodeCanyon buyers — extract the package, open Visual Studio, rebuild, then complete the Setup Wizard. No manual migration commands required.
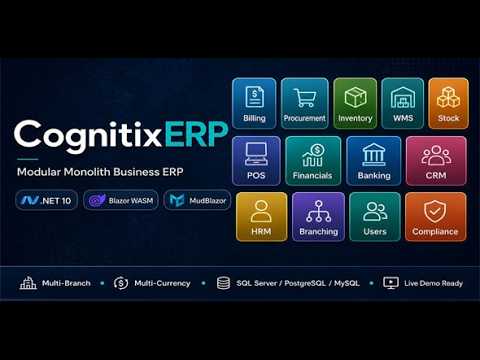
Video — Local installation walkthrough
Prefer watching instead of reading? This video shows CodeCanyon buyers how to install and run CognitixERP locally after purchase.
Step 1 — Extract the downloaded file
1 Unzip CognitixERP-v3.1.0.zip
After downloading from CodeCanyon, extract the archive.
Prefer a short folder path (example: D:\CognitixERP\)
to avoid Windows path-length issues.
Inside the extracted folder you will find:
- Source/CognitixERP/ — Visual Studio solution
- Documentation/ — offline HTML guides (this file lives here)
- Database/ — notes and recovery script
- README.txt, EULA.txt, CHANGELOG.md, and related package files
Step 2 — Locate the project solution
2 Open CognitixERP.sln
Navigate to Source → CognitixERP, then double-click
CognitixERP.sln. This launches the project in Visual Studio.
Step 3 — Verify project load
3 Confirm folders, then Clean & Rebuild
Ensure these directories are visible in Solution Explorer:
- apps — WebApp (Blazor)
- src — API and all modules
- test — unit tests and related projects
If they appear, the solution opened successfully.
- Run Build → Clean Solution
- Run Build → Rebuild Solution
Step 4 — Push to GitHub (recommended)
4 Private repo for CI/CD
It is recommended to push the project to GitHub initially. Future deployments can be automated with GitHub CI/CD.
- The solution includes a
deploy/folder with scripts and templates for domain / pipeline setup. - Keep the repository private.
- Push the repo to GitHub when ready.
Source/CognitixERP/deploy/hetzner/README.md.
Step 5 — Configure startup projects
5 Multiple startup (HTTPS)
In Visual Studio:
- Right-click the solution → Configure Startup Projects…
- Choose Multiple startup projects
- Set Cognitix.WebApp and Cognitix.API to Start
- Use the https profile for both
Step 6 — Database configuration
6 Choose an engine
CognitixERP supports PostgreSQL, SQL Server, and MySQL. For this guide we use PostgreSQL as an example — create a database instance (or ensure your login can create one).
Step 7 — Run the project & Setup Wizard
7 F5 and complete /setup
Start debugging. The browser opens the Setup Wizard at /setup.
Fill the required fields — no dotnet ef commands needed.
Local URLs (default)
| Field | Value |
|---|---|
| Frontend URL | https://localhost:7019 |
| API URL | https://localhost:7149 |
/api to the API URL.
The WebApp already calls paths like api/....
Wizard flow
- Database & URLs — company, engine, host, database name, credentials → Continue
- Administrator — create your first admin account
- License — locally, click Skip — 14 day trial
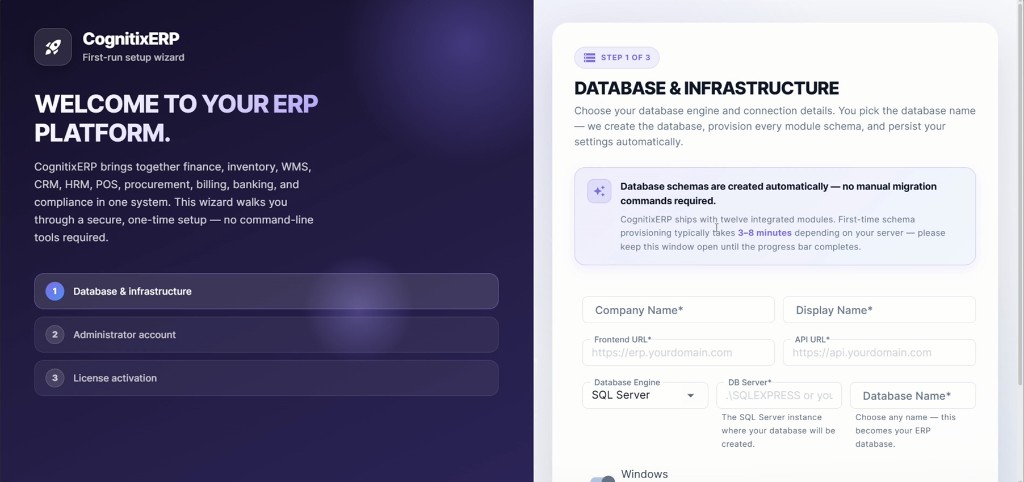
Example — Local SQL Express values
- Frontend URL:
https://localhost:7019· API URL:https://localhost:7149(no/apisuffix). - Engine: SQL Server · Server:
.\SQLEXPRESS· choose a database name → Continue.
Result: Schemas for all modules are created (often 3–8 minutes).
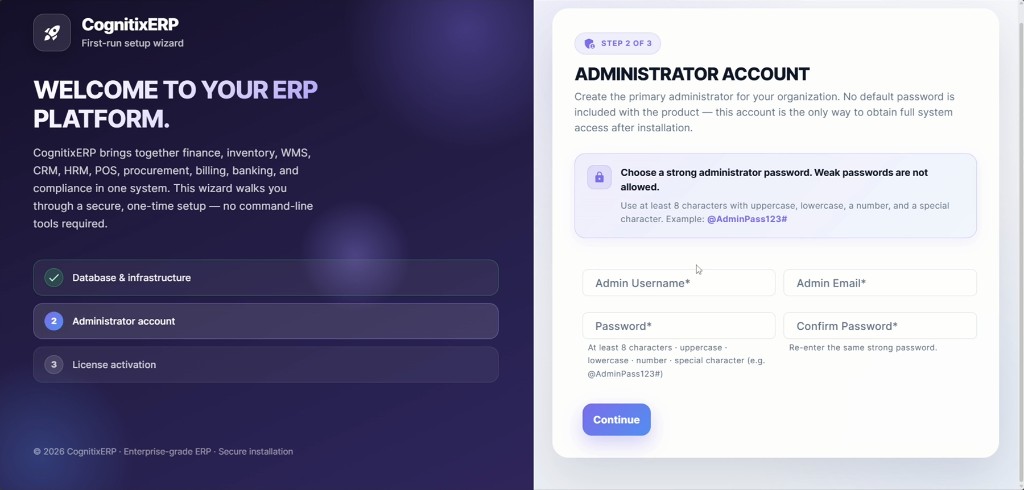
Example — Strong admin password
- Fill Admin Username, Email, Password, Confirm Password (8+ chars with upper, lower, number, special).
- Click Continue.
Result: First admin account is ready for login after setup.
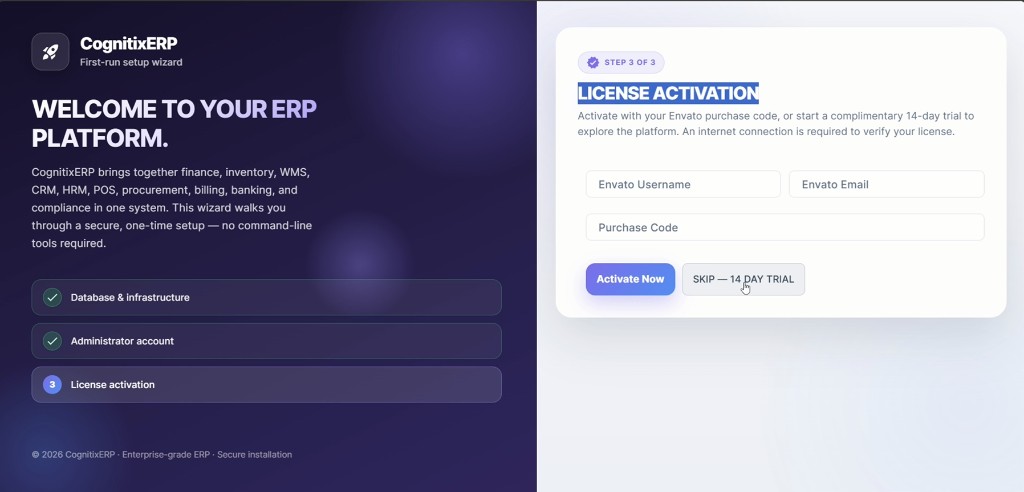
Example — Local trial
- On a local Visual Studio run, click Skip — 14 day trial.
- On production, enter Envato username, email, and purchase code → Activate Now.
Result: Trial or Active license is recorded and the completion screen appears.
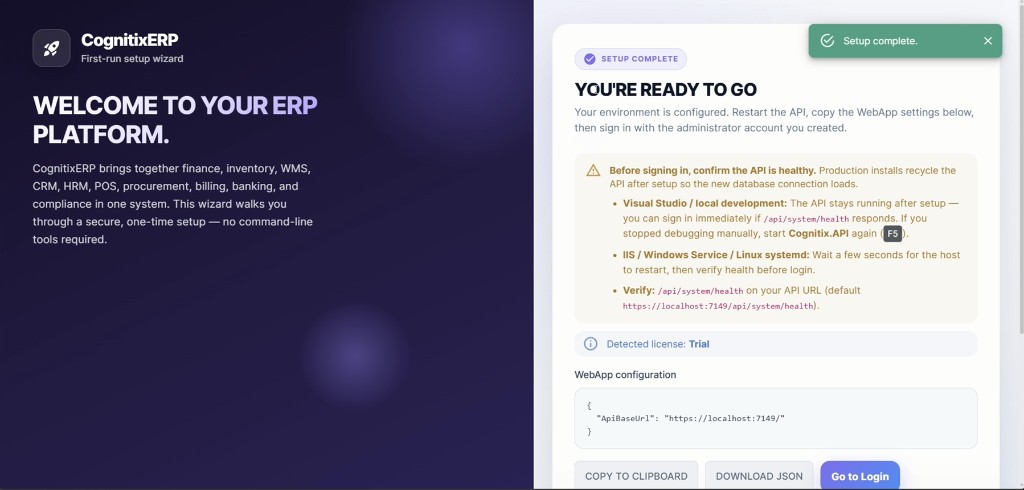
ApiBaseUrl if needed, then Go to Login.
Example — Sign in after F5
- Restart the API if it recycled, then open
https://localhost:7149/api/system/health. - Click Go to Login or browse to
https://localhost:7019/users/login.
Result: You sign in with the admin from Step 2 and can follow the User Manual first steps.
When setup finishes successfully, restart the API (stop and Start again), then sign in at:
https://localhost:7019/users/loginAfter the first successful setup, database migrations and later updates apply automatically when the API runs — usually only a few seconds on restart.
Step 8 — Documentation & support
8 Keep learning & get help
Further reading
- Local: HTML guides in the package
Documentation/folder - Online User Manual: https://www.cognitixerp.com/docs/UserManual.html
- User Manual (offline copy)
- Production Deployment Guide
- Troubleshooting & FAQ
Please Contact us
- Sign up at https://cognitivebd.com
- Create a Support Ticket.
- Within 48hr we will reply.
- WhatsApp: +18632279760
Or email support@cognitivebd.com with your purchase code, version, and screenshots/logs.